Prerequisites
- SecureAuth Connect Workforce workspace with administrative privileges, configured with the same user store defined in your Meraki configuration.
- User account with administrative privileges for Cisco Meraki.
- SAML authentication requires Cisco Meraki with MX firmware version 16.13+ or 17.5+.
- Users need AnyConnect VPN client version 4.8 or higher on either Windows, macOS, Linux, or mobile devices to terminate remote access connections successfully.
SecureAuth Connect Configuration
- Log in to your SecureAuth Connect Workforce workspace with an admin account.
- In your workspace, select Applications > Clients > Create client.
- Enter a name, select SAML Service Provider, and click Create.
- Download the SAML Metadata.
- Scroll down and enable Override SAML Attributes.
- Go to the Attributes tab, choose mail from the predefined attribute list, and click Save to apply the changes.
- On the SAML tab, select the Manual and set the following configurations:
Entity ID : Enter your Cisco Meraki SAML entity URL.
For example, https://merakivpn.example.com/saml/sp/metadata/SAML
For example, https://merakivpn.example.com/saml/sp/acs
Enable Override Subject NameID, set Name ID Format to urn:oasis:names:tc:SAML:1.1:nameid-format:emailAddress and Name ID Value to mail.
- Click Save.
Cisco Meraki Configuration
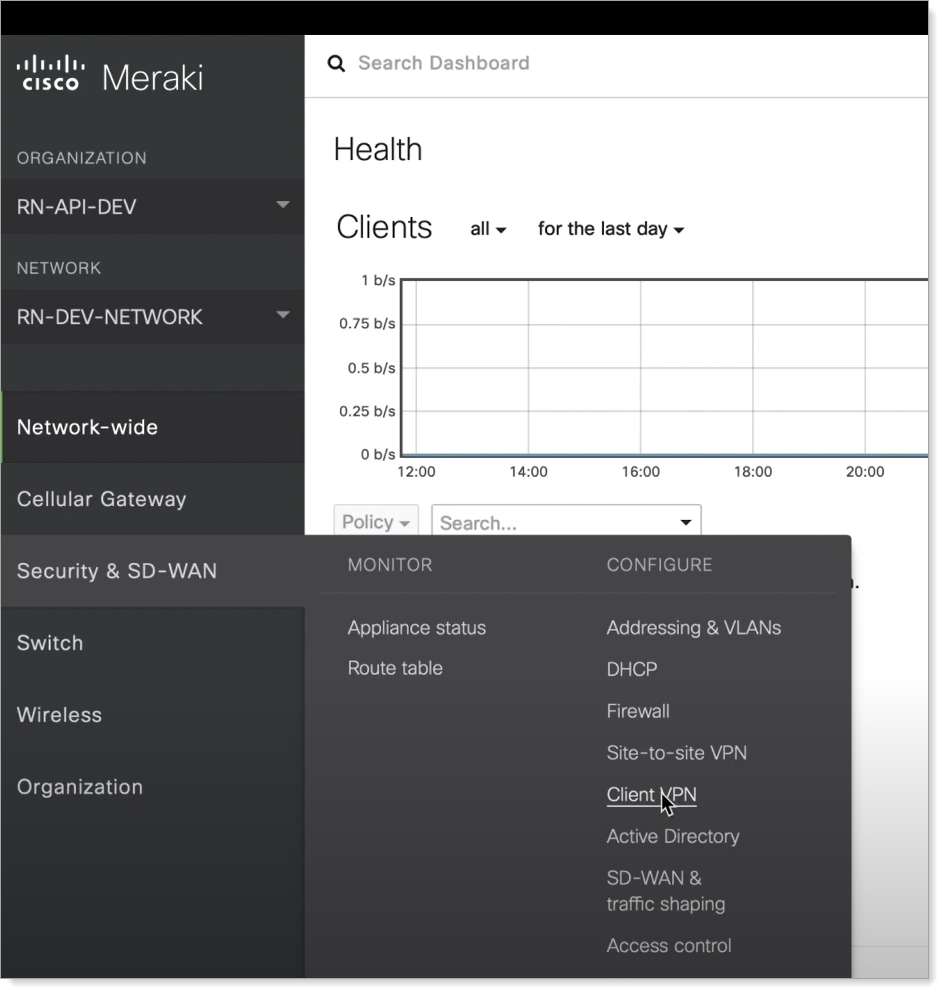
- Log in to Cisco Meraki as an administrator.
-
Navigate to Security & SD-WAN > CONFIGURE and click Client VPN.
-
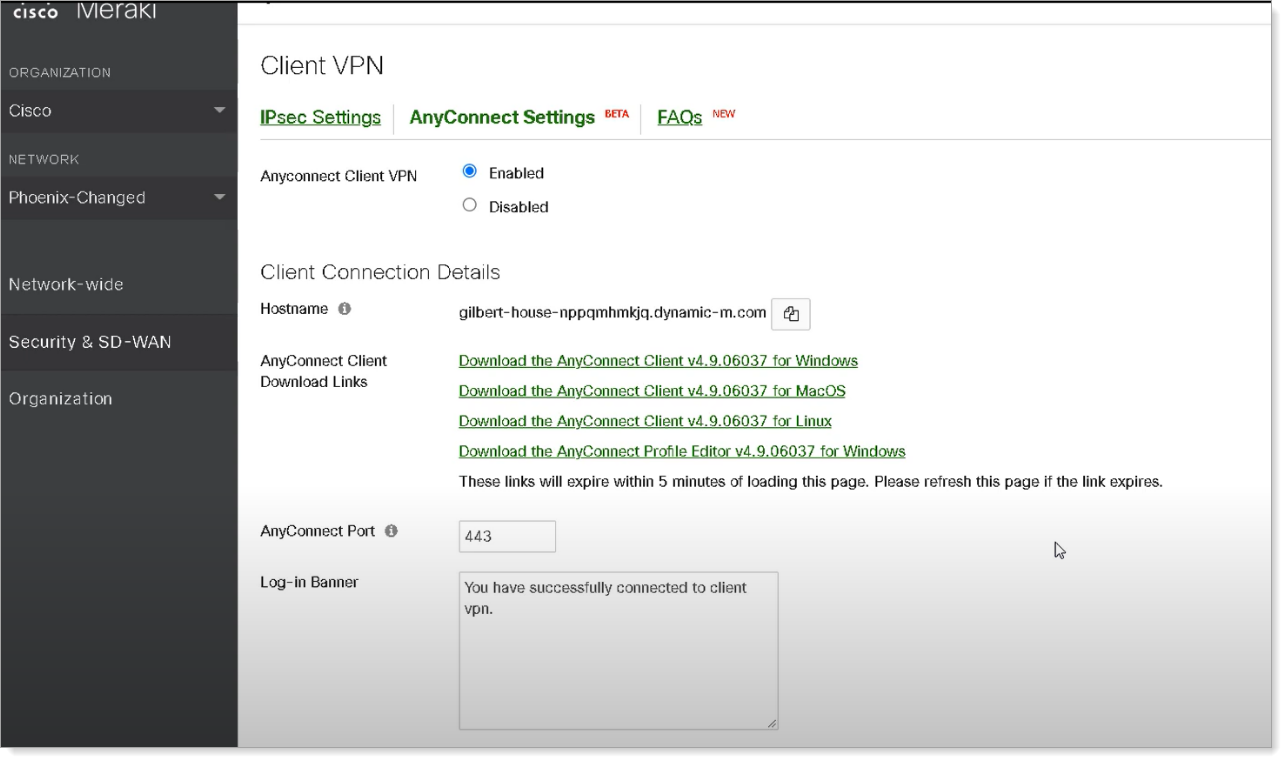
On the AnyConnect Settings page, for AnyConnect Client VPN, select the Enabled option.
-
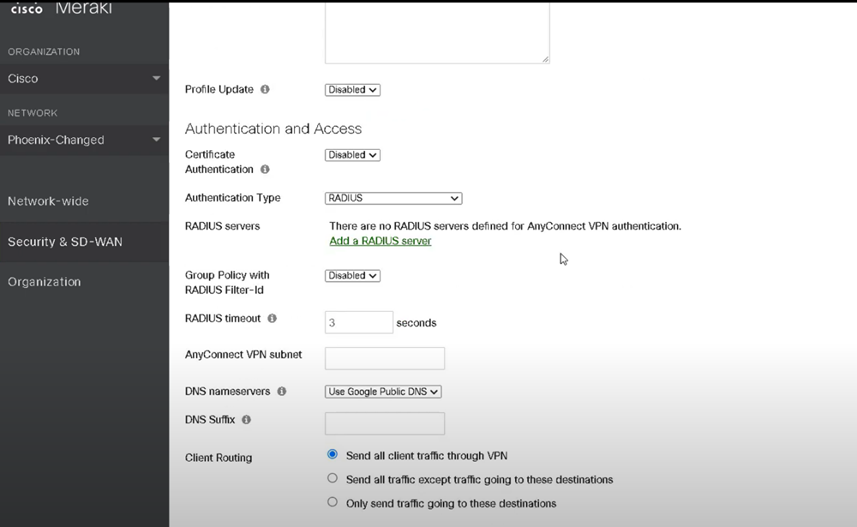
Scroll down and change the Authentication Type to SAML.
-
Enter the AnyConnect Server URL.
For example:
https://Merakivpn.example.com.Add
:portto the end of the URL if using a port other than the default port443.Make sure the AnyConnect URL starts with
https://.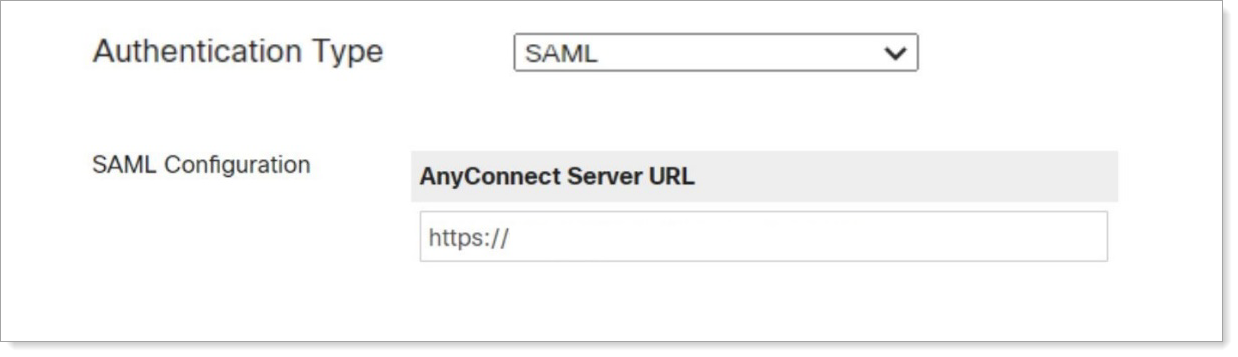
-
Click Choose File to upload the SecureAuth Connect metadata that was downloaded earlier.

- Save your configuration.
Comments
Please sign in to leave a comment.